Top 8 Oil Painting Techniques All Beginners and Professionals Should Know
Stock Photos from Kuznetcov_Konstantin/Shutterstock
This post may contain affiliate links. If you make a purchase, My Modern Met may earn an affiliate commission. Please read our disclosure for more info.
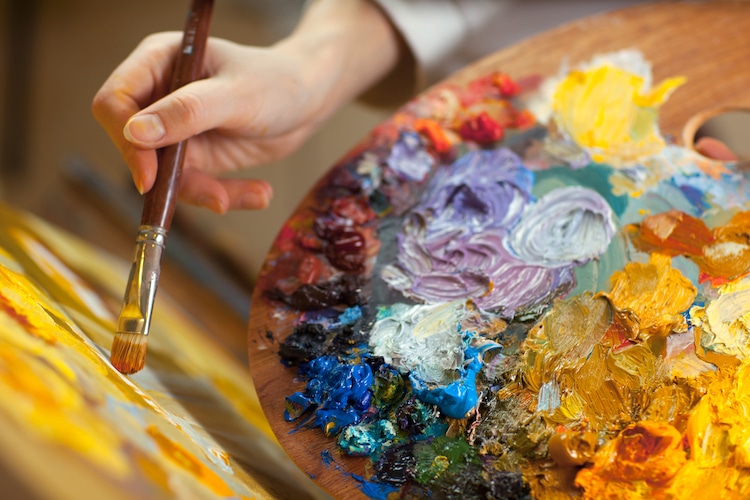
Oil paint has a long tradition in art history. Many of the world’s greatest creatives have used this material to produce their masterpieces, and its legacy lives on as one of the most popular media today. If you’ve ever thought about painting or are a professional looking to switch up your practice, chances are that oils have crossed your mind.
Acrylic and oil are two of the most well-known types of paints used by contemporary artists. But what is the difference between acrylic vs oil paints? It all comes down to how they are constructed. Oil paints feature pigments that are suspended in oil (typically linseed) while acrylics have their colors bound using acrylic polymer emulsion. Acrylics can be thinned with water, but oil paints require more care. To thin the pigment or clean your brushes, you’ll have to use turpentine or mineral spirits.
Don’t let the extra work of maintaining oil paints turn you off to them. There are good reasons why artists continue to use them; the pigments are rich in tone and have a lustrous finish to them. Additionally, oil paints are slow to dry and give you time to change your artwork after you’ve laid down an initial brushstroke.
Excited to learn how to oil paint? Check out the basic supplies and essential oil painting techniques that you need to know.
Stock Photos from Kuznetcov_Konstantin/Shutterstock
This post may contain affiliate links. If you make a purchase, My Modern Met may earn an affiliate commission. Please read our disclosure for more info.
This post may contain affiliate links. If you make a purchase, My Modern Met may earn an affiliate commission. Please read our disclosure for more info.
Oil paint has a long tradition in art history. Many of the world’s greatest creatives have used this material to produce their masterpieces, and its legacy lives on as one of the most popular media today. If you’ve ever thought about painting or are a professional looking to switch up your practice, chances are that oils have crossed your mind.
Acrylic and oil are two of the most well-known types of paints used by contemporary artists. But what is the difference between acrylic vs oil paints? It all comes down to how they are constructed. Oil paints feature pigments that are suspended in oil (typically linseed) while acrylics have their colors bound using acrylic polymer emulsion. Acrylics can be thinned with water, but oil paints require more care. To thin the pigment or clean your brushes, you’ll have to use turpentine or mineral spirits.
Don’t let the extra work of maintaining oil paints turn you off to them. There are good reasons why artists continue to use them; the pigments are rich in tone and have a lustrous finish to them. Additionally, oil paints are slow to dry and give you time to change your artwork after you’ve laid down an initial brushstroke.
Excited to learn how to oil paint? Check out the basic supplies and essential oil painting techniques that you need to know.
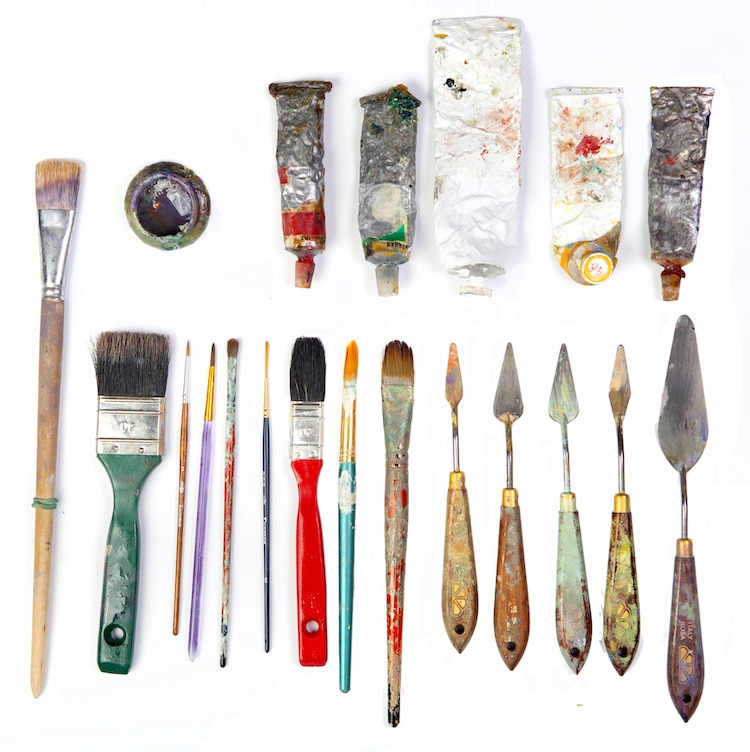
Before you begin to paint with oils, here are some of the supplies you’ll want to have on hand. Chances are that you have some of them if you have painted with acrylic or watercolors before. It is, however, best to have a set of tools that are only for oil-based paint—water and oil don’t mix!
A set of oil paints — You’ll want at least a basic set of hues to get you started. We’ve written a guide on what to look for in a set of oil paints, as well the best oil paint sets to buy.
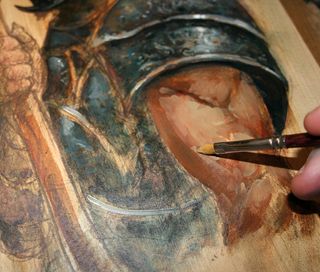
A set of brushes — Look for many types of brushes that are geared towards oil paints. You’ll want different sizes as well as different shapes. Depending on what you’re painting, you’ll want to switch the type of brush you’re using. A flat brush, for instance, is great for creating layers of solid color while the round size allows you to add a lot of fine details to your work.
Paint palette — The stereotypical palette is a curved wooden board with a hole for your thumb. While that is certainly an iconic object, there are much more comfortable options available. Though plastic palettes are the norm; this one is portable, too, for painting on the go.
Palette knife — The best practice for mixing colors is with a palette knife. Using one will allow you to mix even hues and avoid loading your brush with pigment as you try and mix. You can also use a palette knife to apply textural paint, like artist Anastasia Ablogina.
Canvas — If properly primed, you can use paint with oil on a variety of surfaces. Canvas, however, is the go-to for many artists and what we’d recommend if you’re just starting out.
Turpentine or Turpenoid — To clean your brushes and thin pigment, you’ll need a bottle of turpentine or Turpenoid handy. We recommend Turpenoid because it’s odorless, but make sure you’re still working in a studio with good ventilation.
https://mymodernmet.com/oil-painting-techniques/
Shabrina Aulia Aldis
1022191063
S1 Gizi
Fakultas Kesehatan
Univeritas M.H Thamrin
Before you begin to paint with oils, here are some of the supplies you’ll want to have on hand. Chances are that you have some of them if you have painted with acrylic or watercolors before. It is, however, best to have a set of tools that are only for oil-based paint—water and oil don’t mix!
A set of oil paints — You’ll want at least a basic set of hues to get you started. We’ve written a guide on what to look for in a set of oil paints, as well the best oil paint sets to buy.
A set of brushes — Look for many types of brushes that are geared towards oil paints. You’ll want different sizes as well as different shapes. Depending on what you’re painting, you’ll want to switch the type of brush you’re using. A flat brush, for instance, is great for creating layers of solid color while the round size allows you to add a lot of fine details to your work.
Paint palette — The stereotypical palette is a curved wooden board with a hole for your thumb. While that is certainly an iconic object, there are much more comfortable options available. Though plastic palettes are the norm; this one is portable, too, for painting on the go.
Palette knife — The best practice for mixing colors is with a palette knife. Using one will allow you to mix even hues and avoid loading your brush with pigment as you try and mix. You can also use a palette knife to apply textural paint, like artist Anastasia Ablogina.
Canvas — If properly primed, you can use paint with oil on a variety of surfaces. Canvas, however, is the go-to for many artists and what we’d recommend if you’re just starting out.
Turpentine or Turpenoid — To clean your brushes and thin pigment, you’ll need a bottle of turpentine or Turpenoid handy. We recommend Turpenoid because it’s odorless, but make sure you’re still working in a studio with good ventilation.
https://mymodernmet.com/oil-painting-techniques/
- Shabrina Aulia Aldis
- 1022191063
- S1 Gizi
- Fakultas Kesehatan
- Univeritas M.H Thamrin
:max_bytes(150000):strip_icc():format(webp)/best-brands-of-acrylic-paint-2577374_FINAL-a8cc2aefaa22421aa04bee12d13226c7.gif)
